


Your browser just flagged another site as “Not Secure.” That warning? It costs real money. Studies show that even a single security warning reduces conversions by up to 20%, and Google has been using HTTPS as a ranking factor since 2014.
If your site is still running on HTTP in 2025, you’re not just losing trust. You’re leaving rankings on the table.
This guide walks you through the entire HTTP to HTTPS migration process, step by step. No fluff, no skipped parts. Whether you’re on WordPress, Apache, Nginx, or Cloudflare, you’ll find exactly what to do here and, just as importantly, what not to do.
What Is HTTP to HTTPS Migration (and What Actually Changes)
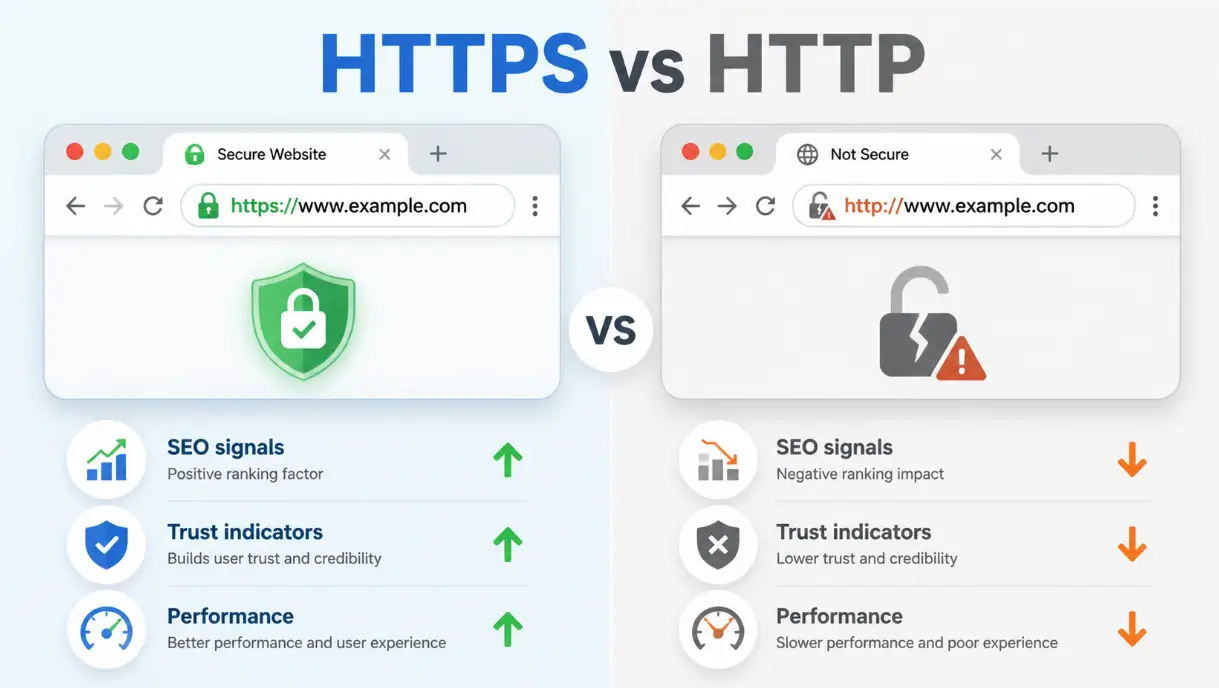
HTTP (HyperText Transfer Protocol) sends data between your browser and server in plain text. Anyone on the same network can read it. HTTPS adds a layer of encryption using SSL/TLS certificates, so data is scrambled before it travels.
When you migrate from HTTP to HTTPS, three things happen:
- Authentication: Visitors reach your actual server, not an impersonator.
- Encryption: Data in transit cannot be read by third parties.
- Data integrity: Content can’t be tampered with between server and browser.
For everyday blogs and business sites, the login page alone is reason enough. Without HTTPS, your admin username and password travel across the internet as plain text.
How HTTPS Affects Your SEO Rankings
Google officially confirmed HTTPS as a ranking signal back in 2014. It started as a lightweight factor, but its weight has only grown since. Today, nearly all pages ranking on the first page of Google are served over HTTPS.
Here’s what the migration directly impacts from an SEO perspective:
| SEO Factor | Before (HTTP) | After (HTTPS) |
| Ranking Signal | Weak / none | Active positive signal |
| Chrome Browser Label | “Not Secure” warning | Padlock icon |
| Referral Data (Analytics) | Often lost, shows as Direct | Passed correctly |
| HTTP/2 Access | Not available | Enabled (faster load) |
| User Trust | Lower | Higher |
| Core Web Vitals | Slower (HTTP/1.1 only) | Faster via HTTP/2 |
One thing competitors rarely mention: referral data loss. If your site is on HTTP and someone shares your link from an HTTPS site like Reddit or LinkedIn, Google Analytics records that visit as “Direct” traffic. You lose insight into where your audience is coming from. Migrate to HTTPS and that data comes back.
For a deeper look at how security changes affect your search presence, see our guide on the impact of HTTPS on SEO.
Step 1: Get Your SSL Certificate
You can’t run HTTPS without an SSL certificate. Here are your options:
Free Option: Let’s Encrypt
Let’s Encrypt is a free, automated certificate authority. Most hosting providers now offer it with one click through cPanel or Plesk. If your host doesn’t offer it natively, Certbot is the recommended tool to install it manually.
- Valid for 90 days, but auto-renews
- Trusted by all major browsers
- No paperwork or payment required
Paid SSL Certificates
For businesses that need extended validation (the type that shows your company name in the address bar), paid certs from Comodo, DigiCert, or GlobalSign are the way to go. A basic domain validation cert runs under $10/year.
| Certificate Type | Cost | Validation | Best For |
| Domain Validation (DV) | Free (Let’s Encrypt) or under $10/yr | Email only | Blogs, small sites |
| Organization Validation (OV) | $30-$100/yr | Business documents | Business websites |
| Extended Validation (EV) | $100-$300/yr | Full legal verification | Banks, ecommerce |
| Wildcard SSL | $70-$200/yr | Email only | Sites with subdomains |
Step 2: Install the Certificate on Your Server
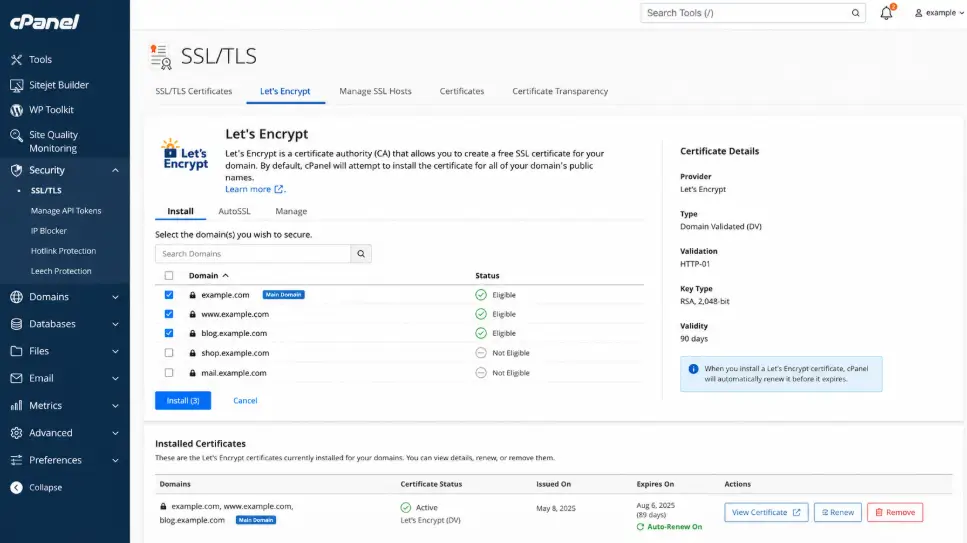
[ IMAGE: Screenshot: cPanel SSL/TLS section with Let’s Encrypt install screen ]
Most managed hosting panels (cPanel, Plesk, Kinsta, WP Engine) handle installation automatically once you issue the cert. For VPS or dedicated servers, here’s the manual process.
Apache
Locate your virtual host config (usually at /etc/apache2/sites-available/yourdomain.conf) and add the paths to your certificate file, private key, and certificate chain. Restart Apache after saving.
Nginx
Open your server block config and point ssl_certificate to your .crt file and ssl_certificate_key to your .key file. Add ssl_protocols TLSv1.2 TLSv1.3 for modern security. Reload Nginx.
After installation, verify the cert is active using SSL Labs’ free test at ssllabs.com/ssltest. Aim for an A or A+ rating.
Step 3: Set Up 301 Redirects
A 301 redirect tells search engines that your HTTP URLs have permanently moved to HTTPS. This is the most important SEO step in the whole process. Get this wrong and you’ll split your link equity between two versions of your site.
Apache (.htaccess)
Add these lines to the top of your .htaccess file:
RewriteEngine On RewriteCond %{HTTPS} off RewriteRule ^(.*)$ https://%{HTTP_HOST}%{REQUEST_URI} [L,R=301]
Nginx
Add a separate server block that handles port 80 and returns a 301 to the HTTPS version:
server { listen 80; server_name yourdomain.com www.yourdomain.com; return 301 https://$host$request_uri; }
Cloudflare
If you’re using Cloudflare, go to SSL/TLS > Edge Certificates and toggle “Always Use HTTPS” to on. Cloudflare handles the redirect at the CDN level, no server config needed.
One thing to check: make sure you’re doing a single redirect, not a chain. HTTP > HTTPS is fine. HTTP > HTTP www > HTTPS www is three hops and slows your site.
Step 4: Fix Mixed Content Errors
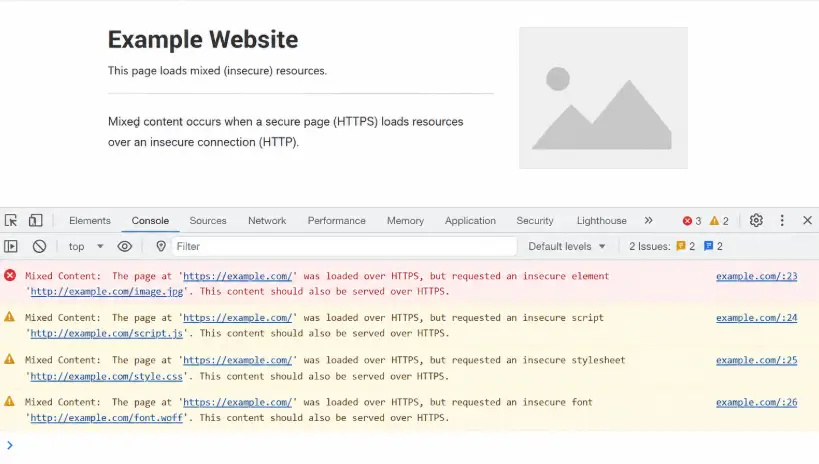
Mixed content happens when your page loads over HTTPS but still calls resources (images, scripts, stylesheets) over HTTP. Chrome shows a broken padlock, and some browsers block the resources entirely.
How to find them:
- Open Chrome DevTools (F12) and check the Console tab for mixed content warnings
- Use the free tool WhyNoPadlock.com to scan your URLs
- Run a site crawl with Screaming Frog or Sitebulb
How to fix them:
- Hardcoded HTTP links in content: Do a database search and replace (more on this in Step 5 for WordPress).
- External scripts/fonts: Update the src attribute from http:// to https://, or use protocol-relative URLs (//).
- CDN resources: Update the origin URL in your CDN settings to use HTTPS.
Step 5: Update WordPress Database URLs
If you’re on WordPress, your database contains thousands of hardcoded HTTP references: post content, metadata, widget settings, theme options. You need to update them all.
Option A: WP-CLI (Recommended)
If you have server access, this is the safest and fastest method. Run:
wp search-replace ‘http://yourdomain.com’ ‘https://yourdomain.com’ –skip-columns=guid
Option B: Better Search Replace Plugin
Install the Better Search Replace plugin, run a search for your HTTP domain, replace with the HTTPS version, and check all tables. Always run a dry run first before applying changes.
Option C: Update wp-config.php
Add these two lines to wp-config.php to force WordPress to use HTTPS:
define(‘WP_HOME’,’https://yourdomain.com’); define(‘WP_SITEURL’,’https://yourdomain.com’);
This alone won’t fix database references but forces the admin and frontend to load via HTTPS immediately.
Doing a broader site health check alongside this step? Our SEO audit service covers full technical reviews including HTTPS migration issues.
Step 6: Update Google Search Console, Analytics, and Sitemap
Search engines treat HTTP and HTTPS as two completely different sites. You need to register the HTTPS version properly.
Google Search Console
- Add https://yourdomain.com as a new property
- Verify ownership (HTML tag, DNS, or Google Analytics method)
- Set it as your preferred domain
- Keep the old HTTP property, but don’t delete it (it retains historical data)
Google Analytics
- Go to Admin > Property Settings and update the Default URL to HTTPS
- If using GA4, update the data stream URL
XML Sitemap
- Regenerate your sitemap so all URLs begin with https://
- Submit the new sitemap in Search Console under Sitemaps
- Update the sitemap URL in your robots.txt file
Also update any external backlinks you control: social profiles, directory listings, guest posts with author bios.
For ongoing monitoring after migration, technical SEO support helps catch crawl errors and indexing issues before they affect rankings.
Step 7: Enable HSTS
HTTP Strict Transport Security (HSTS) is a browser instruction that forces HTTPS for every request, even if someone types http:// in the address bar. It removes the redirect entirely for returning visitors, which speeds up your site.
Add this header to your server config:
Strict-Transport-Security: max-age=31536000; includeSubDomains; preload
Start with a short max-age (like 300 seconds) to test first. Once everything is confirmed working, set it to 31536000 (one year) and submit your domain to the HSTS preload list at hstspreload.org.
Warning: HSTS with a long max-age is hard to undo. If you ever need to revert to HTTP, browsers will keep refusing insecure requests until the max-age expires. Test thoroughly before committing.
Post-Migration SEO Checklist
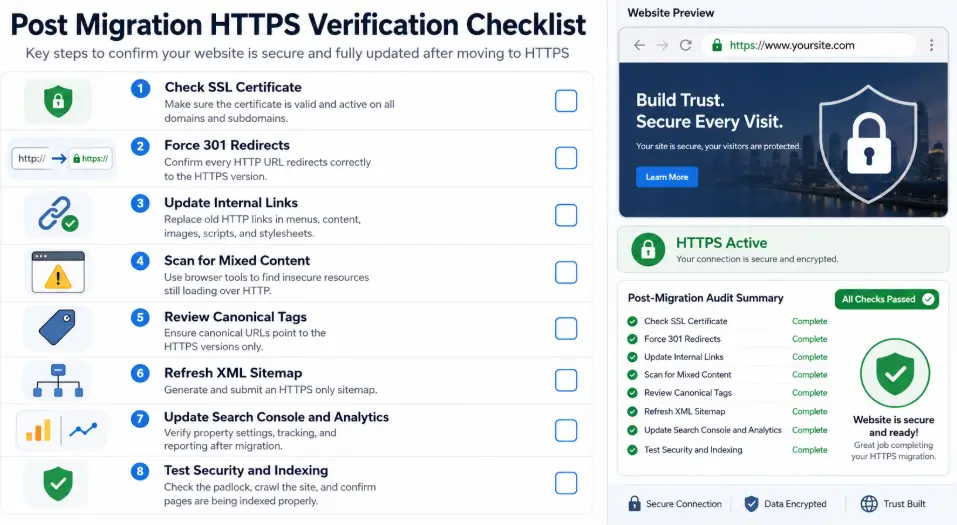
Once the migration is live, run through this before you call it done:
- SSL certificate is installed and shows valid in browser
- All HTTP URLs return 301 to HTTPS (not 302)
- No mixed content warnings in Chrome DevTools
- www and non-www both redirect to your preferred HTTPS version
- txt is accessible at https://yourdomain.com/robots.txt
- Sitemap submitted to Google Search Console (HTTPS version)
- Google Analytics is tracking HTTPS traffic correctly
- Core pages are indexed under HTTPS (check site:yourdomain.com in Google)
- Internal links all point to HTTPS
- Canonical tags use HTTPS URLs
- HSTS header is active
- SSL Labs test returns A or A+ grade
Common Mistakes That Kill Rankings After Migration
Using 302 redirects instead of 301. A 302 is temporary. Google doesn’t pass link equity through it. Always use 301 for permanent moves.
Redirecting to the wrong URL. Don’t send http://domain.com to https://www.domain.com if your canonical is non-www. Keep the URL structure identical, only swap the protocol.
Forgetting to update the disavow file. If you have an active disavow file in Search Console, re-upload it to the new HTTPS property.
Leaving old HTTP URLs in your sitemap. A sitemap full of HTTP URLs tells Google you haven’t fully migrated.
Not monitoring rankings for 4-6 weeks. Some ranking fluctuation after migration is normal. If traffic drops more than 10-15% after two weeks, check for crawl errors and broken redirects immediately.
If you’re unsure whether your site health is in good shape before making this move, an SEO audit can flag any existing issues that could compound during migration.
FAQ
How long does HTTP to HTTPS migration take for Google to pick up?
Google typically re-crawls and re-indexes HTTPS URLs within 1-4 weeks for established sites. Expect minor ranking fluctuations during this period. Keep your HTTP 301 redirects in place permanently.
Will I lose my backlink authority when I migrate?
Not if you’ve set up proper 301 redirects. Link equity passes through 301 redirects. The key is making sure every old HTTP URL redirects to its exact HTTPS equivalent, not just the homepage.
Can I migrate from HTTP to HTTPS without an SSL certificate?
No. HTTPS requires an SSL/TLS certificate. Without one, browsers will show a security error. Use Let’s Encrypt for a free certificate if budget is a concern.
Do I need HTTPS for a simple blog?
Yes. Google uses it as a ranking signal regardless of site type. Chrome labels HTTP sites as “Not Secure.” Even if you don’t handle payments or logins, migrating is worth it for rankings and user trust.
What’s the difference between HTTP and HTTPS for SEO?
HTTPS gives you a positive ranking signal, preserves referral data in Analytics, enables HTTP/2 (faster performance), and removes the “Not Secure” browser label. All of these have downstream SEO benefits.
Conclusion
Migrating from HTTP to HTTPS isn’t a one-click job, but it’s far less complicated than most guides make it seem. The steps are logical: get a cert, install it, redirect traffic, fix mixed content, update your database and tools, then verify everything is clean.
The SEO risk isn’t in migrating. The risk is in doing it sloppy, whether that’s using 302 redirects, skipping the mixed content check, or forgetting to update Search Console.
Done right, the migration protects your rankings and builds the kind of long-term trust that keeps users coming back. If you want expert guidance on the technical side, our SEO consulting and local SEO teams are here to help.
